Showing posts with label Frugal Living. Show all posts

September 14, 2012

Homemade Liquid Laundry Detergent (Plus a FREE printable label!)


Buying laundry detergent can put a big dent in any budget, and making my own is one way where I save the bucks.

If you bought 5 gallons worth in the store, you'd be paying around $100!! Maybe even more than that depending on the brand.  But, when you make your own - you can make 5 gallons for less than $2!!  

When I buy all the ingredients for the first load - it comes out to $6.95 - but there is still lots of borax & washing soda left, so all that I need to buy for the next few batches is the Fels Naptha soap (which is really cheap!).


That makes 20 gallons for under $10!


Making your own detergent accounts for some enormous savings!

I buy my ingredients at WalMart, which I've found to be the cheapest place to buy them at.  Let me break down my costs for you.

  • Borax - $2.99
  • Washing Soda - $2.99
  • Fels Naptha Soap - $0.97

You can also purchase the ingredients on Amazon, but I've found that they are more expensive this way for the borax & washing soda.  However, the Fels Naptha price isn't bad on there.

You can also use essential oil for scent, but that's completely optional.  The essential oil adds nothing to the cleaning power, but does give it a nice smell if you'd like to have it.  If you do want the added scent, I really like using orange essential oil because of the clean smell that it has.  Plus, it's also the one that I recommend for using in my homemade carpet powder. If you purchase it on Amazon (which has a great price on it), it runs about $5.00 for 4 ounces.  You only need 1/2oz to 1oz for a 5 gallon batch (depending on how much scent you want) so it lasts for a good while, and doesn't add much to the final cost.  Still way cheaper than store bought.

If you're a Tide detergent lover - check out the tip at the bottom of the post!

So, are you ready to make your own laundry detergent & rack up the savings? I'll walk you through how I make mine.

Here's what you need:


  • Borax
  • Arm & Hammer Super Washing Soda (NOT baking soda)
  • 5.5oz Fels-Naptha Soap (you can also use Zote or castile soap - about the same amount, you don't have to be exactly precise)
  • water
  • 5 gallon bucket


First, you grate up your Fels-Naptha soap.  Or you can substitute Zote (which will make your laundry detergent pink for all your girly-girls) or pure pure castile soap.


Add the soap shreds to a pot with 4 cups of hot water.  Put the heat on medium-high, and stir until completely melted - about 10 minutes.


Fill up a 5 gallon bucket halfway with hot water.  Pour in the melted soap mixture.  


Then, stir in 1 cup of borax & 1 cup of washing soda.


If you're using the essential oil, now is the time to add it.  You add in 1/2oz to 1oz, depending on how scented you want it.  Although, I never really measure it anymore - I just shake in enough drops to where I feel satisfied, and stir.


Now, fill up the bucket with warm water all the way to the top - and stir again.  If you don't have a utensil long enough to reach the bottom, just put on a pair of rubber dish gloves beforehand.


Snap on a lid, and let it sit for 24 hours to gel up.  Note: it will be more of a gloppy gel than purely gel, and this is completely normal - and what it should look like.

At this point, you can divide it up between different containers (empty laundry detergent containers, milk jugs, etc).  I prefer to save 1 laundry detergent container, & refill it as needed to save on space.

A lot of people like to dilute it even more at this step (therefor turning the 5 gallons into 10 gallons) - filling their container halfway with the gel & then the other half with water.  You can choose to do this if you like.  However, my family seems to produce pretty dirty clothes, and I prefer to not dilute mine further.  I feel like the cleaning power is stronger this way. 


For HE front loading washers, use 1/2 cup for a large load.  For regular top-loading washers, use 1 cup for a large load.  You can use stain removers or oxi-clean with this too if you would like - just the same as you would use them with the detergent you buy in the store.

I love this detergent, and have compared it to store-bought & I can't tell a difference.

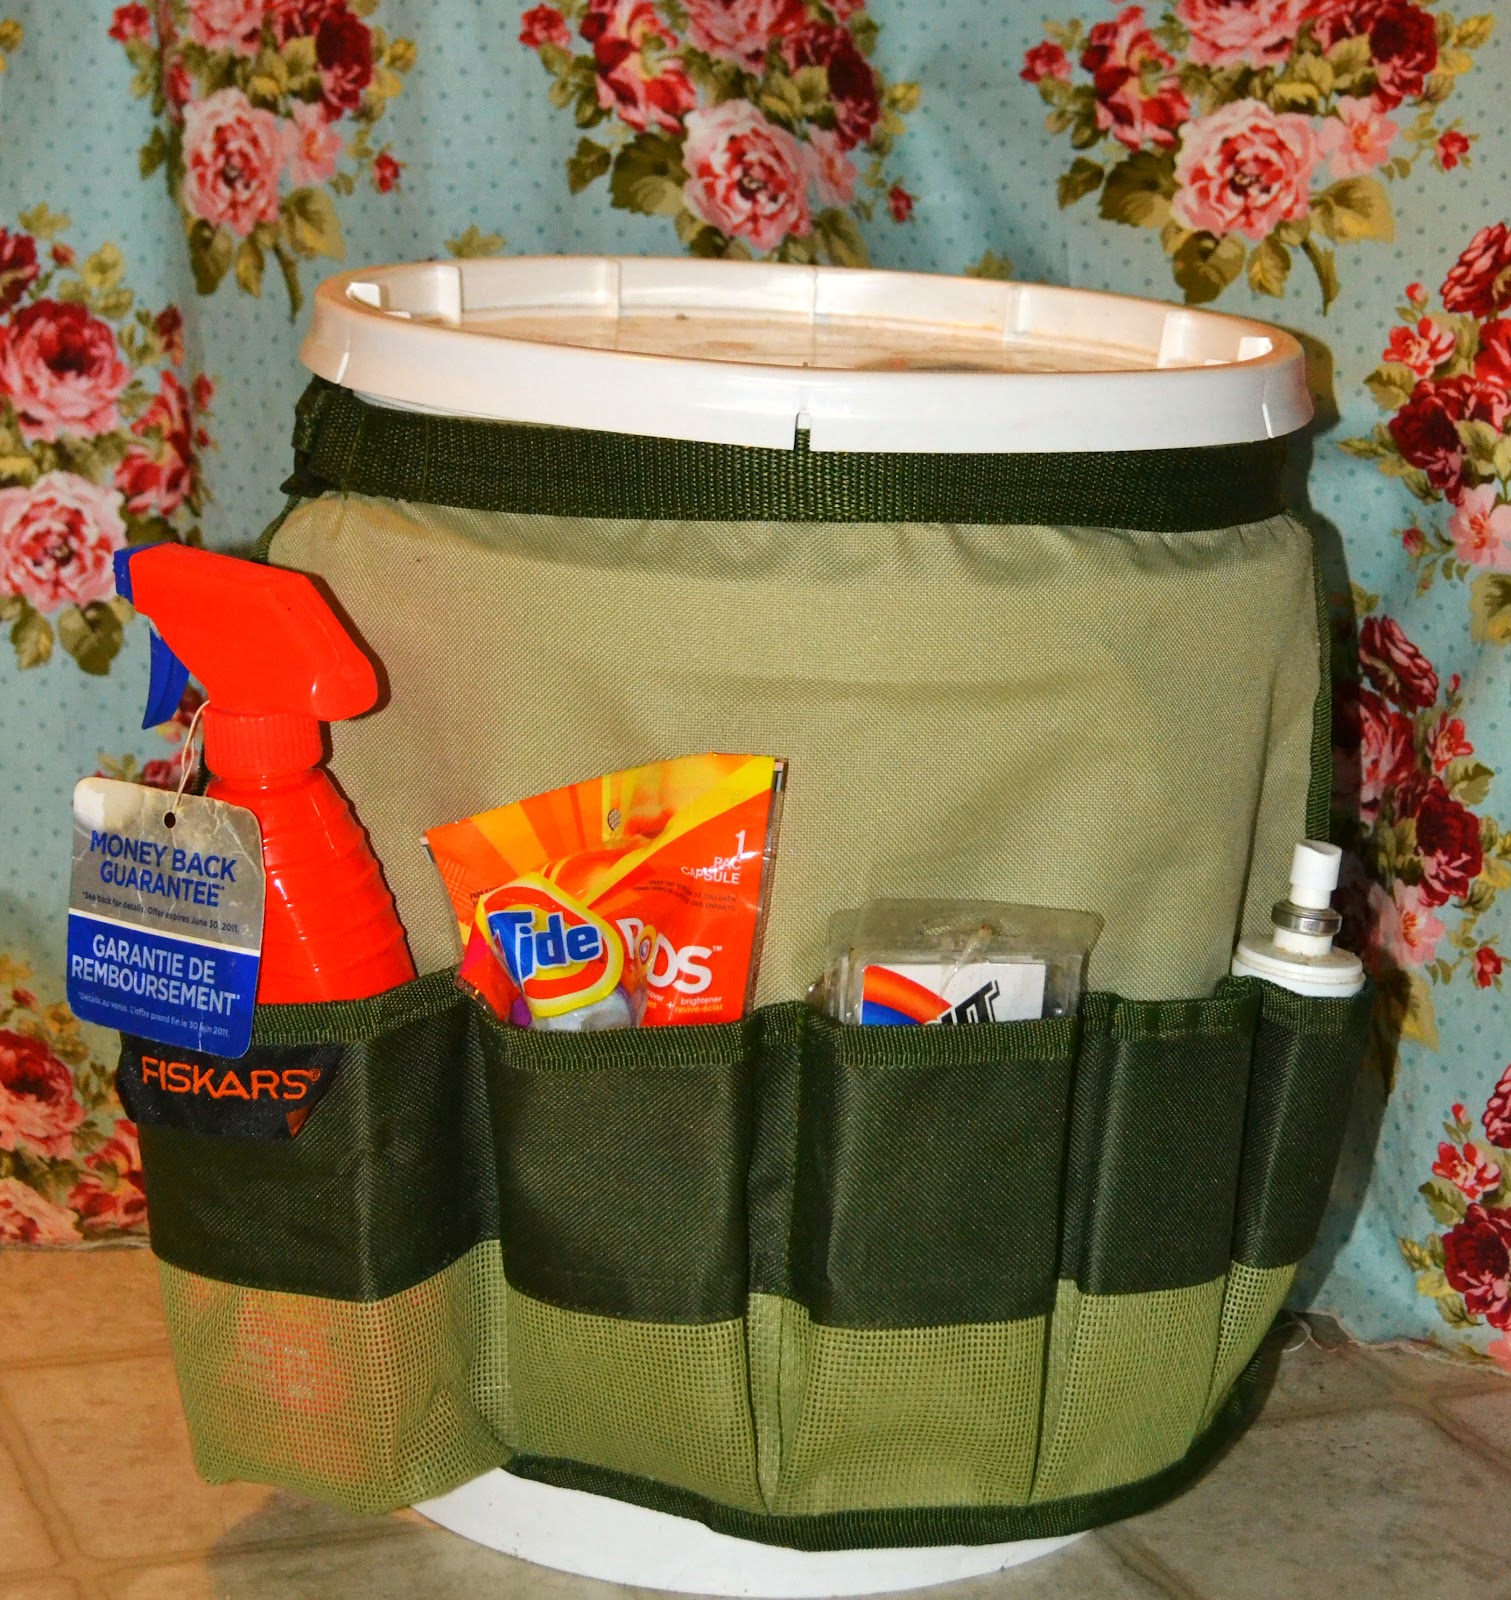
I have attached this neat bucket organizer that my mother gave me around mine.  I use it to organize laundry detergent samples, stain remover, etc.  


You can leave your homemade detergent in the bucket, or you can split up the large batch between empty detergent containers, milk jugs, etc.  

I created this pretty printable label for your homemade detergent containers too.  Just right click to save to your computer to print, or use the printer friendly button at the end of this post.  Enjoy!!


**Per a readers tip, if you are a TIDE lover - use a little liquid TIDE in your homemade detergent for extra stain-fighting power!


Never miss a thing, follow me on Facebook!


MrsHappyHomemaker


Shared with these great blog parties!

August 2, 2012

Vanilla Bean Coconut Milk Ice Cream


Here is a re-vamped & much healthier version of the typical ice cream that we all love in the hot months of summer.  It's also dairy free, making it a great option for those who are dairy/lactose intolerant.  It only has 3 ingredients, so it's definitely easy & budget friendly - plus you can pronounce all the ingredients in it!  Definitely a plus in my book.  You don't even have to have an ice cream maker to pull if off either, although you can use one for faster preparation.


Vanilla Bean Coconut Milk Ice Cream
created by Mrs Happy Homemaker for Life Around Home

Ingredients:
  • 2 (14oz) cans full-fat coconut milk
  • 1/2 cup honey
  • 1 vanilla bean, split & insides scraped out with a knife (you can also substitute 2 tablespoons of real vanilla extract for the vanilla beans)

Instructions:

Thoroughly combine the coconut milk, honey, & the insides of the vanilla bean with a whisk or electric mixer.  Make sure you beat it well for the honey to combine with the coconut milk.  If using an ice cream maker, follow the manufacturers instructions. Afterwards, place the ice cream in a covered freezer-safe container & freeze for a few hours for flavors to meld & for the ice cream to firm up.  Alternatively, if not using an ice cream maker, place the combined mixture into a glass or steel bowl, cover with plastic wrap, & freeze - removing every hour to whisk it until it's the desired consistency.  This will last 1-2 weeks in the freezer.  


MrsHappyHomemaker


Shared with these great blog parties!

July 6, 2012

Pourable Snack Containers from Creamer Bottles


{photo credit}


I usually make my own coffee creamer, but sometimes I do buy the store bought stuff when I have coupons that make it free (I love super double coupon events!).  I think my favorite thing about the store-bought creamer is recycling them into really clever snack containers.  

You can put a variety of snacks inside, and it makes me feel like I'm being all green and stuff.  

We recently brought one to a picnic at the park, filled with cashews & peanuts.  


So, next time you buy a bottle of store-bought creamer, don't send that container off to the landfill.  Wash it out, and turn it into a useful place to store snacks.

Do you re-use & re-purpose anything?



MrsHappyHomemaker


Shared with these great blog parties!

December 22, 2011

Peppermint Candy Trays - and fluted bowls too!


Ok, so I am pretty happy with the outcome of this project I did. I made a tray and a bowl out of peppermint candies!  It is SO easy!  I know I'm going to make more, it's addictive.  But, I just had to show you this neat little craft.


All you need is peppermint candies of your color choice, and parchment paper.  I used both green and red - you could also use the same color.

Just line up the candies in whatever pattern and shape of your choosing on a parchment paper lined baking sheet.  Separate them just a tad, as shown.  


Bake it in an oven preheated to 350 degrees for about 7-10 minutes.  Remove and set it on a wire baking rack to cool for a few minutes.


Make sure you watch that time!!  You do not want it to over cook it. Refer to the photo below & don't repeat my mistake!


After a few minutes, carefully remove the parchment paper.  Remember, these are fragile.  Don't get upset if all of it doesn't come off - you aren't going to be looking at the backside.  Let the tray cool at room temperature for a couple hours.  Do NOT place in the fridge to get it to cool faster - it will crack. I learned this the hard way.


When it has cooled for several hours, it is ready to use.  It should not be sticky - it should dry to be smooth & glossy.  Do not use it to serve hot substances on.  Stick with things like fudge, cookies, candy, and such.  There should not be any flavor of the candies on the food.

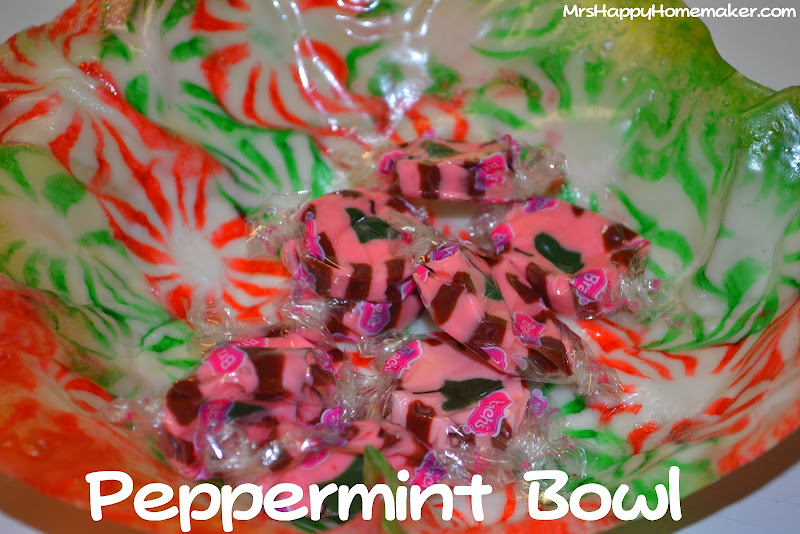
You can also try your hand at making a bowl.  I made a small fluted edge candy dish.  My ends were just starting to cook for too long, but since it had just started, it kind of gave the edges a stained glass look.  

Or so I tell myself. 

To make a bowl, after it has cooled for a few minutes - set the candy inside of a bowl with the parchment paper still attached.  Using a dishtowel, press down very gently to form the shape of a bowl.  If it hangs off the edge of the bowl a little, it will form a fluted edge.  Remember now - gentle!


This is a great little craft to make with the kiddos too.  If at first you don't succeed, try again - and remember, timing & gentleness is everything!  


MrsHappyHomemaker

Check out all the wonderful blog parties that I link up with!

December 14, 2011

Homemade Vanilla Extract (An Update)


It has been a long time since I first posted about making vanilla extract from scratch from vanilla beans.  My first double strength batch has been done for a good while now, so I figured it was about time that I get on here and update ya'll about how I like it.


Ok, so 'like' probably isn't the word to describe it.  It's more like a deep infatuation, maybe even love.  Actually - it's definitely love.  As soon as you crack open a batch, the aroma of it makes your whole house smell like you want to eat it.  This stuff is just fantastic.  Both the aroma & the taste of the items you use it in are out of this world.  I will never again go back to store bought.  This stuff is it for me.


With Christmas right around the corner, how great would this be to give as gifts?  I know it's too late in the season to give a prepared batch, but you can take the original recipe & divide the ingredients in individual mason jars to give.  Attach a note to let the recipient know to open in 3 months for single strength vanilla extract & 6 months for double strength vanilla extract.


Check out the recipe, and get started on making your own homemade vanilla extract.  You won't be sorry!


MrsHappyHomemaker

Check out all the blog parties that I link up with!

September 23, 2011

Double Berry Applesauce


Day 4 - ready for another apple recipe?  

Today, we are dabbling with some homemade applesauce.  Not just any applesauce though.  Double Berry Applesauce.  You caught that double berry right?  That just makes it all the better.


Homemade apple sauce is really much simpler than it sounds, and adding berries to it doesn't complicate it one bit. I like to make large batches using fresh apples, and can it for the rest of the year.  

Double Berry Applesauce - Makes 3 Quarts

Ingredients:
  • 6 lbs apples - peeled, cored, & chopped
  • 2 cups blueberries
  • 2 cups strawberries - chopped
  • 2-4 cups water
Instructions:


Combine all the fruit & 2 cups of the water into a large stockpot.  Bring the mixture to a boil over high heat.


Reduce the heat to medium, & stir occasionally while the sauce simmers - for about 30 minutes, adding more water if necessary.  Your house will smell delicious.


Using a whisk, give that sauce a good beating to break up any clumps of fruit.  


Ladle the applesauce into jars & wipe the rims clean.  You can process in a water bath if you prefer, or you can use this little trick.  As the sauce is cooking, boil your lids in a pot of water.  As soon as you ladle the sauce into the jars, screw the lid on using a pot holder & immediately turn upside down.  Let it sit upside down for about 15 minutes, then turn right side up.  Let it sit for another 15 minutes & you jars should be sealed.


MrsHappyHomemaker
Make sure you check out all the wonderful blog parties I link up with!

.

--> Related Posts Plugin for WordPress, Blogger...